Homemade Pizza Dough
homemade pizza dough — a carefully crafted recipe that balances technique with approachability. Every step is designed to build confidence, not just follow instructions.
Before You Start
- 1Start the dough at least 3 hours before you want pizza, or make it the night before for the best flavor. The yeast needs time to work.
Ingredients
Not hotter than 110°F or it kills the yeast.
One packet. Instant yeast also works.
Adds tenderness to the crust.
Distributes better when dissolved in water.
Feeds the yeast and aids browning.
Step-by-Step Instructions
Dissolve yeast
Take your time here. In a small bowl, combine the warm water, sugar, and yeast. Let sit for 5 to 10 minutes until foamy. If it does not foam, your yeast is dead.
If the yeast does not foam after 10 minutes, your yeast might be dead. Start over with fresh yeast.
The foaming proves the yeast is alive. Dead yeast makes dense, brick-like pizza dough. Always proof your yeast.
Mix the dough
Close enough is fine. You're building a foundation, not a museum piece.
The dough will look shaggy and rough for the first few minutes of kneading. That's normal — keep going.
If too dry, add liquid a tablespoon at a time. If too wet, let it sit a few minutes.
Knead
Turn the dough onto a floured surface and knead for 8 to 10 minutes until smooth, elastic, and springy. The dough should pass the windowpane test: stretch a small piece thin enough to see light through without tearing.
Kneading is a workout, but you'll feel the dough transform under your hands. That's the gluten developing.
Under-kneading is more common than over-kneading. The dough should be smooth and pass the windowpane test.
The windowpane test is the best way to know the gluten is developed. If the dough tears, keep kneading.
First rise
Place the dough in a lightly oiled bowl, cover with plastic wrap, and let rise at room temperature for 2 hours until doubled in size. For better flavor, refrigerate overnight.
An overnight rise in the fridge develops deeper flavor. The cold slows fermentation without killing it.
Shape and second rise
Punch down the dough and divide it into 4 equal pieces (about 210g each). Shape each into a tight ball.
Shaping dough balls takes practice. Do not stress about perfection — even lumpy dough bakes into great pizza.
The dough balls should be smooth and tight on the outside with a small seam on the bottom.
Adding too much flour during kneading. A slightly sticky dough makes a lighter crust.
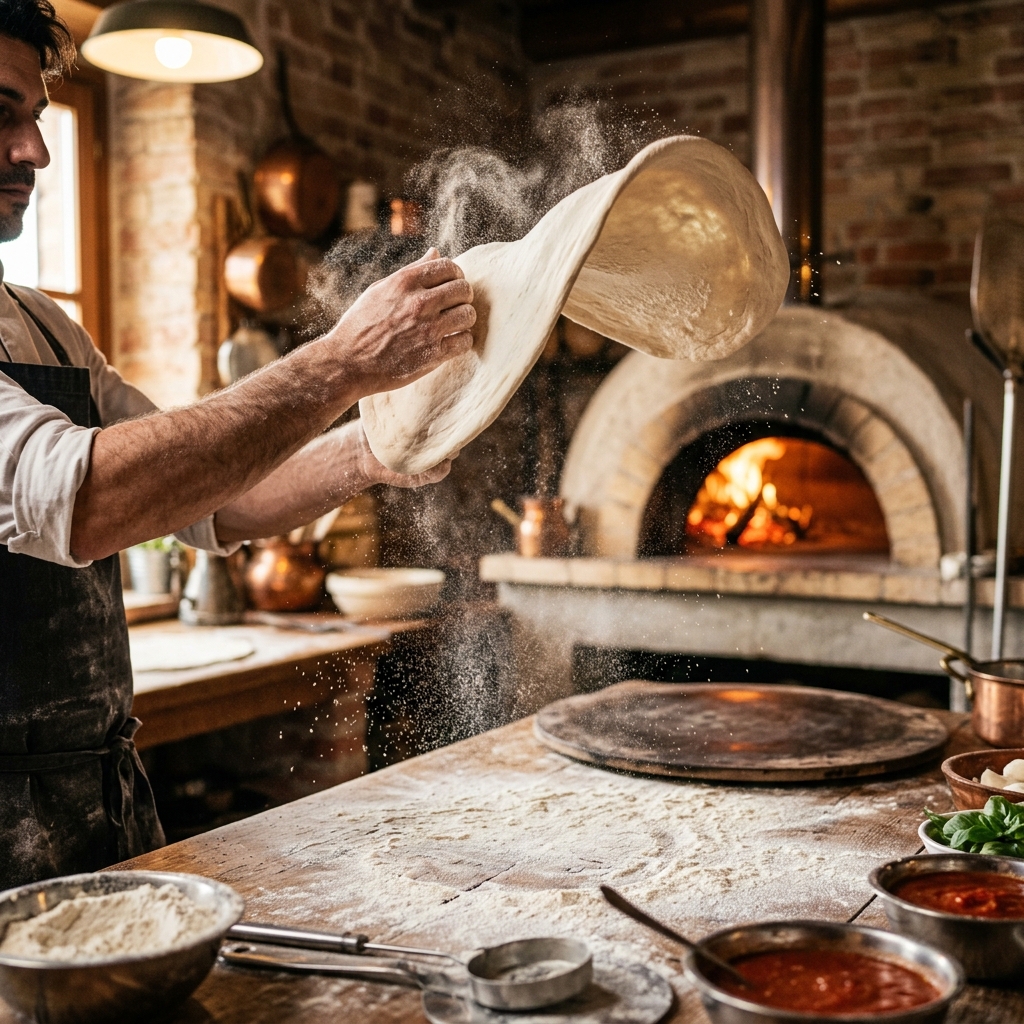
Stretch and bake
Preheat the oven to the highest setting (500°F+) with a pizza stone or inverted baking sheet inside for 45 minutes. Stretch one dough ball into a 10 to 12-inch round on a floured surface. Top as desired and slide onto the hot stone. Bake for 10 to 12 minutes until the crust is golden and the cheese bubbles.
A hot pizza stone or inverted baking sheet preheated for 45 minutes gives you the crispiest bottom crust.
How to Know It's Done
- Internal temperature reaches your target doneness (see table above).
- A thermometer probe slides in with little resistance.
- The surface has a deep brown crust, not gray.
- The crust should be golden brown and puffed. Tap the bottom — it should sound hollow. The cheese should be bubbling and spotted with brown.
Nutritional Profile
Macros listed below scale dynamically based on the serving size selected in the recipe card.
Kitchen Timer
Quick Facts
Need to scale or convert sizes?
This recipe links with our specialized calculators. Use them to calibrate oven dials, adjust brine salinity percentages, or scale baking pans.
Try the Grams to Cups ConverterTechnique Notes
- Freeze the extra dough balls on a baking sheet, then transfer to a freezer bag. Thaw in the fridge overnight before using.
- For a crispier bottom crust, sprinkle cornmeal or semolina on the peel before sliding the pizza onto the stone.
- A cast-iron skillet also works. Heat the skillet in the oven for 30 minutes, then build the pizza directly in the hot pan.
Common Mistakes to Avoid
- Using cold water kills the yeast's momentum. Make sure your water is between 100-110°F — warm to the touch, not hot.
Troubleshooting FAQ
You May Also Like
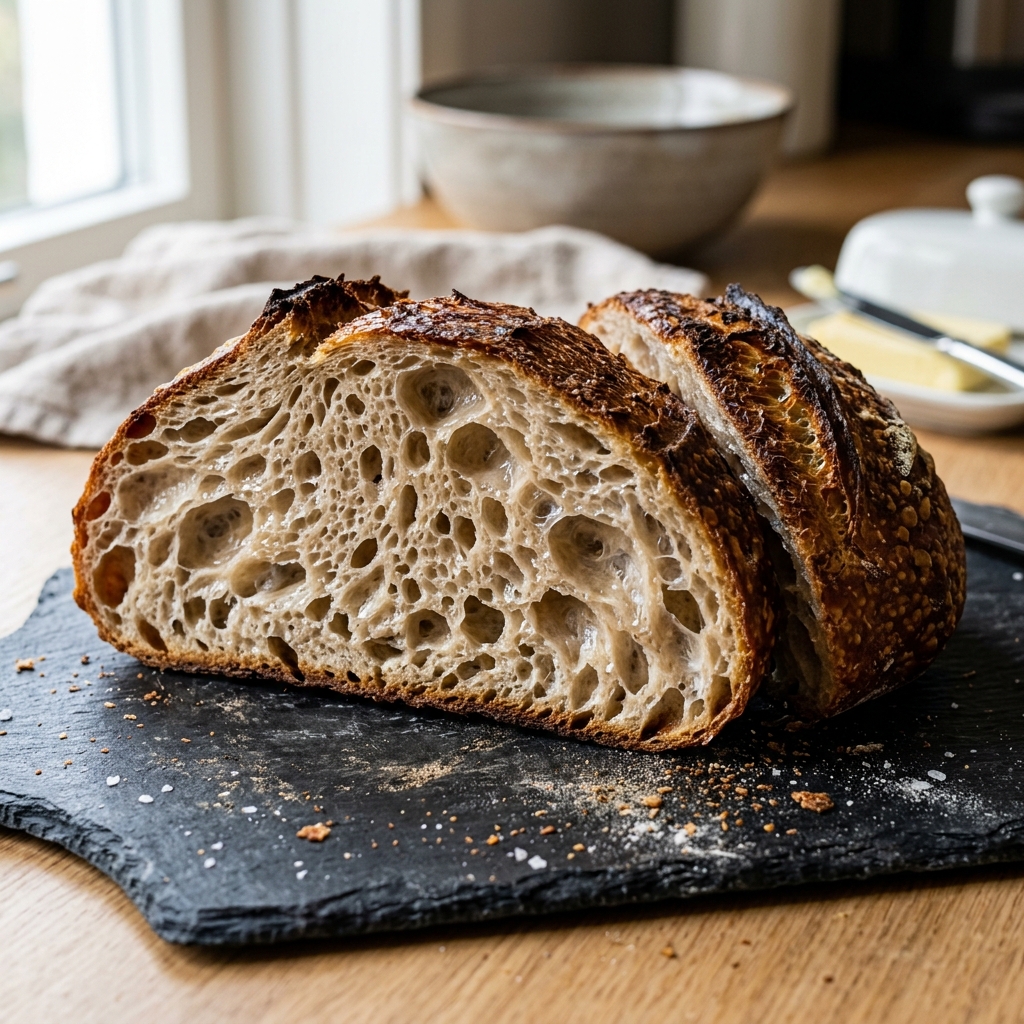
High-Hydration Sourdough Bread
A deep-brown, blistered crust that cracks when you squeeze it, and an open, irregular crumb that catches the light. This method uses an overnight cold retard and a Dutch oven to trap steam, so you get bakery-level rise and tang without a steam-injected oven.
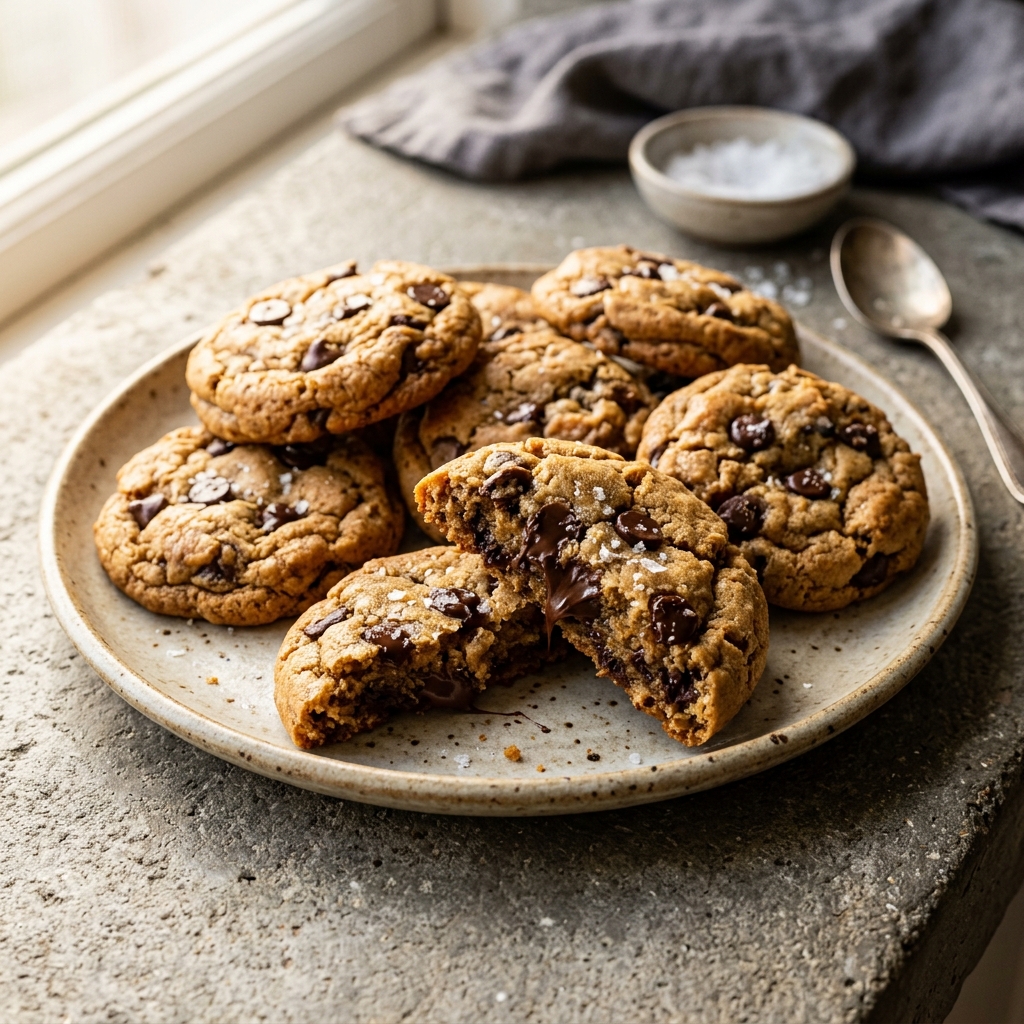
Chewy Keto Chocolate Chip Cookies
Golden edges, soft centers, and a texture that actually holds together — this keto-friendly version skips the usual gummy pitfalls. Made with almond flour and a precise balance of sweeteners, these are drop cookies that taste like the real thing.
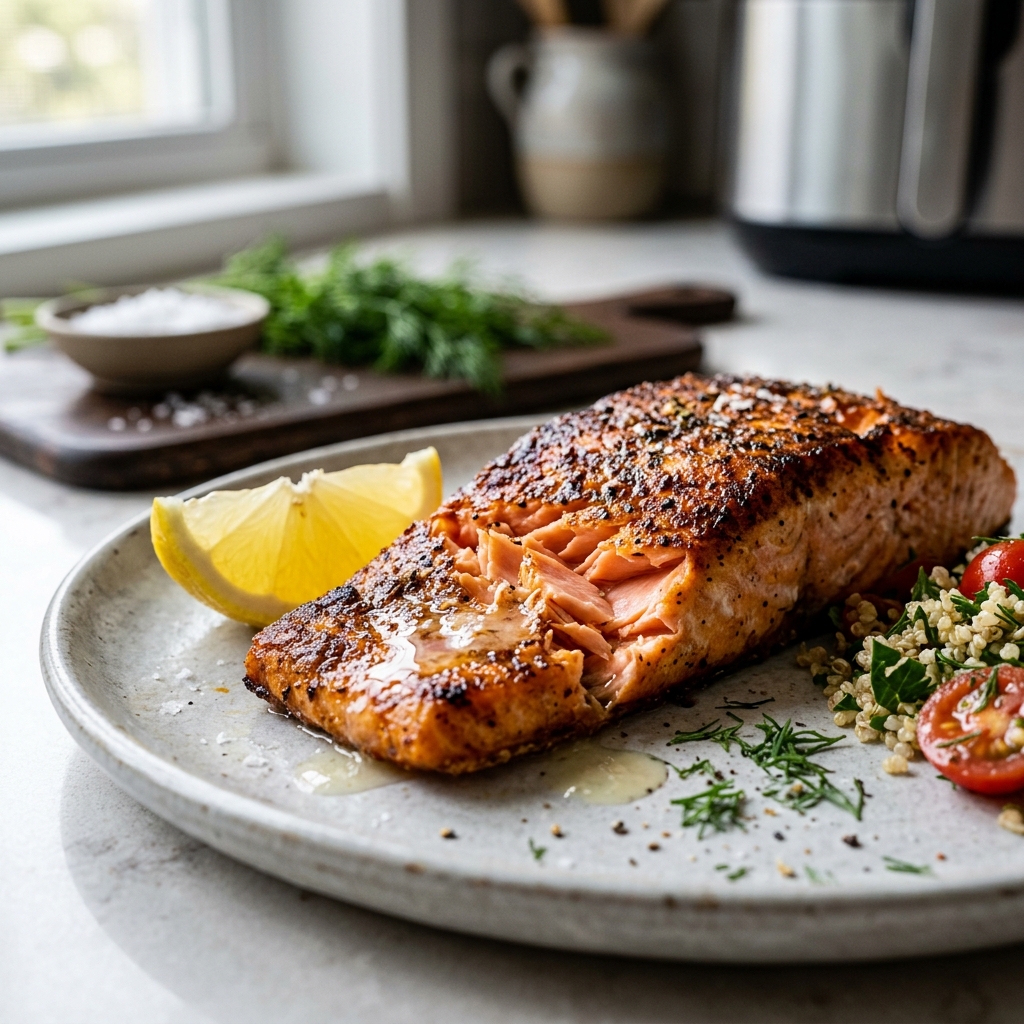
Perfect Air Fryer Salmon
Crispy-edged, flaky-centered salmon straight from the air fryer in under 12 minutes. No flipping halfway, no oil splatter — just a garlic-and-paprika crust that seals in the moisture.
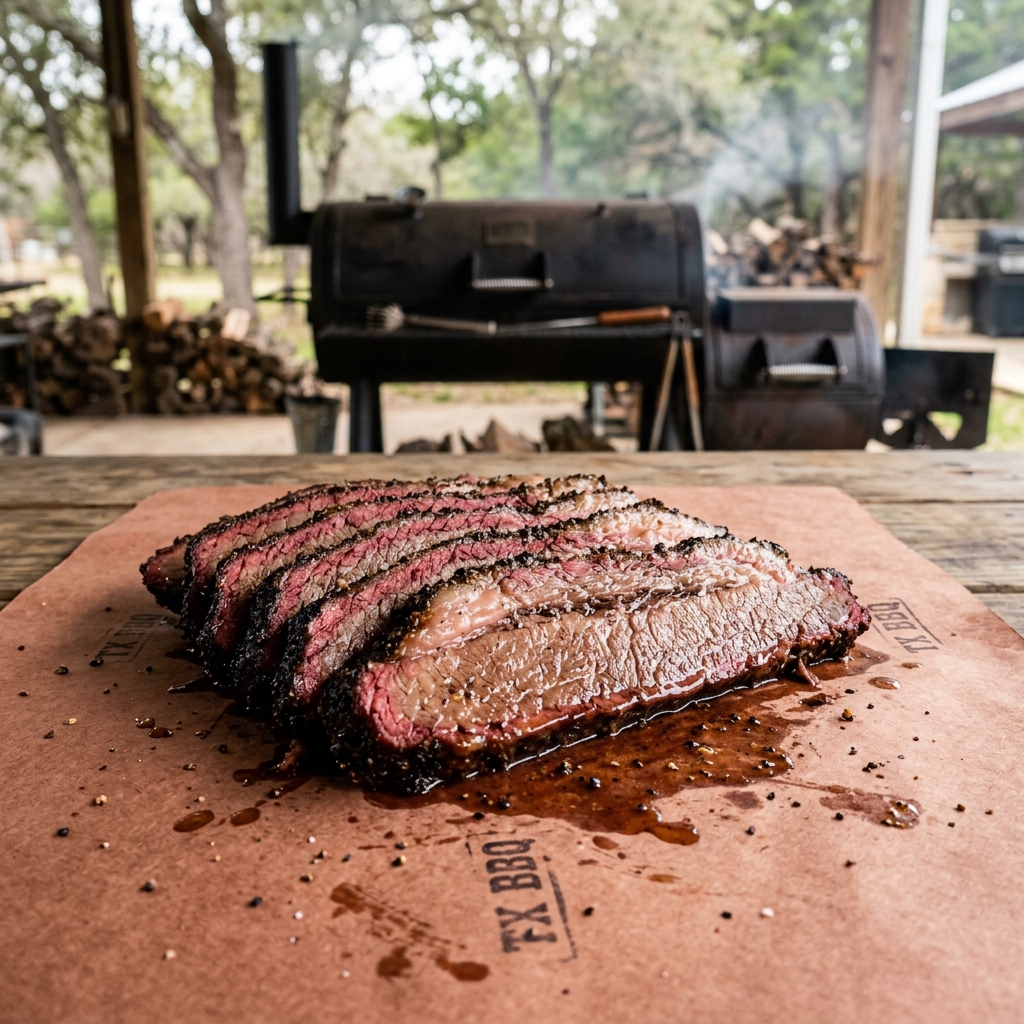
Texas-Style Smoked Brisket
A thick black bark, a deep pink smoke ring, and meat that pulls apart with zero resistance. This Texas-style method uses an overnight dry brine and a paper wrap to power through the stall, giving you competition-level brisket at home.
Tools For This Recipe
Use our precision calculators to adjust servings, convert measurements, and check doneness.
Finished Cooking?
Keep exploring — there is always more to discover in the kitchen.