Classic French Toast
classic french toast — a carefully crafted recipe that balances technique with approachability. Every step is designed to build confidence, not just follow instructions.
Before You Start
- 1Stale bread is better than fresh for French toast. If yours is fresh, toast it lightly first or dry it in a 300°F oven for 5 minutes.
Ingredients
Day-old bread is best. Stale bread absorbs more custard.
Room temperature.
Pure vanilla.
Warm spice flavor.
Optional but excellent.
Pure maple syrup, warmed.
For presentation.
Step-by-Step Instructions
Make the custard
In a shallow dish, whisk together the eggs, milk, vanilla, cinnamon, and nutmeg until smooth and fully combined.
Whisk vigorously until no streaks of egg white remain. The custard should be a uniform tan color.
Soak the bread
Heat a large skillet or griddle over medium heat. The bread needs about 20 seconds per side to soak through. While the pan heats, dip each slice into the custard. The bread should be fully saturated but not falling apart. Walk away. Time does the work here.
The custard should be a uniform tan color with no streaks of egg white.
Cook until golden
Melt a pat of butter in the hot skillet. Place the soaked bread in the skillet without crowding. Cook for 3 to 4 minutes per side until deep golden brown and slightly puffed. The center should feel firm when pressed. It's normal to hear sizzling — that's the sound of good browning.
If the bread falls apart when you pick it up, you soaked it too long. Next slice, try 15 seconds per side instead.
The bottom should be deep golden brown before you flip. The edges should look crisp and lacy.
Day-old bread works best. Fresh bread can turn soggy — toast it lightly first if needed.
Keep warm and serve
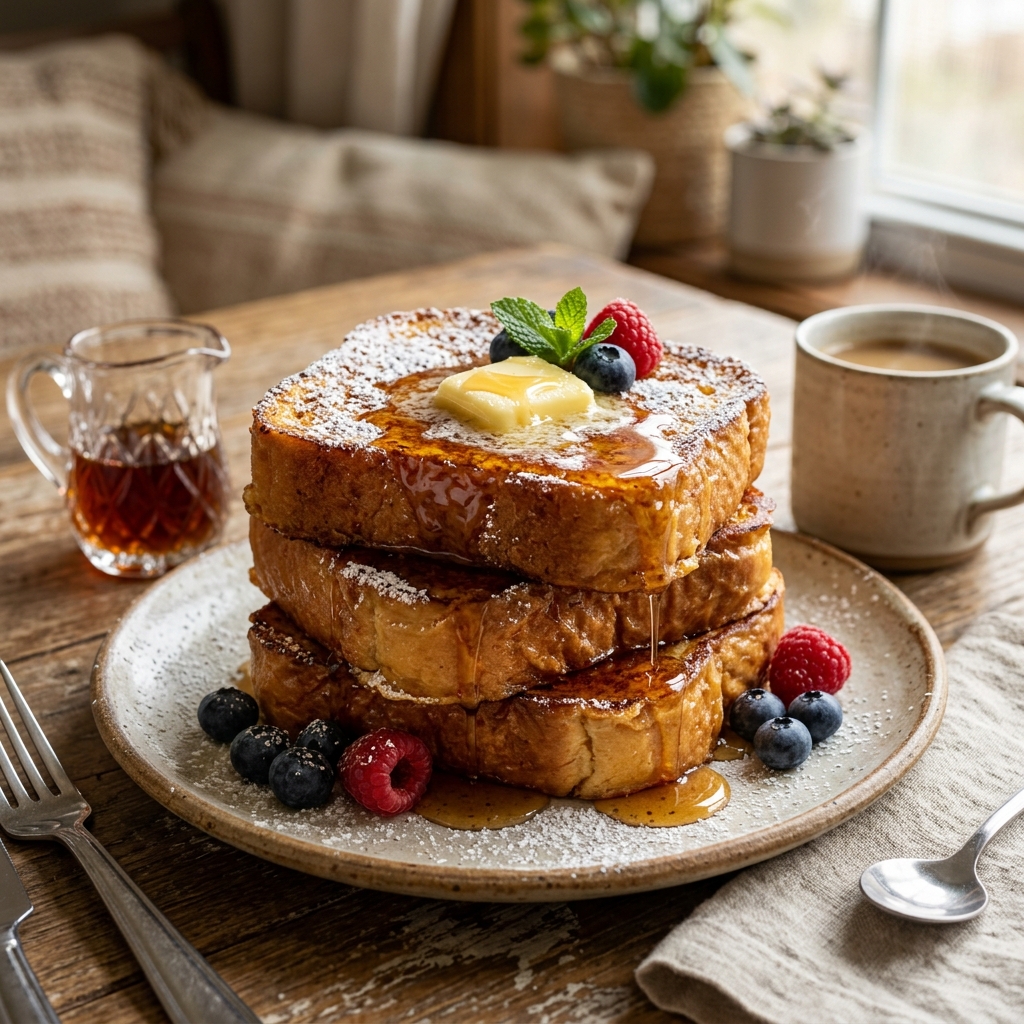
Keep the finished slices warm in a 200°F oven while you cook the rest. They'll stay crisp and hot. Serve in a stack, dusted with powdered sugar, and drizzled with warm maple syrup.
If the custard is too thick, add a splash more milk. If too thin, whisk in another egg.
How to Know It's Done
- Internal temperature reaches your target doneness (see table above).
- A thermometer probe slides in with little resistance.
- The surface has a deep brown crust, not gray.
- The French toast should be deep golden brown on both sides and slightly puffed. Press the center — it should feel firm, not squishy.
Nutritional Profile
Macros listed below scale dynamically based on the serving size selected in the recipe card.
Kitchen Timer
Quick Facts
Need to scale or convert sizes?
This recipe links with our specialized calculators. Use them to calibrate oven dials, adjust brine salinity percentages, or scale baking pans.
Try the Cups to Grams ConverterTechnique Notes
- Stale bread is ideal. If your bread is fresh, dry the slices on a baking sheet in a 300°F oven for 5 minutes per side.
- For extra richness, replace the milk with half-and-half or add a splash of heavy cream.
- Leftover French toast freezes well. Cool completely, freeze on a baking sheet, then store in a freezer bag. Reheat in a toaster.
Common Mistakes to Avoid
- Soaking the bread too long. A 20-30 second soak per side is plenty. Over-soaked bread turns into a soggy, eggy mess.
Troubleshooting FAQ
You May Also Like
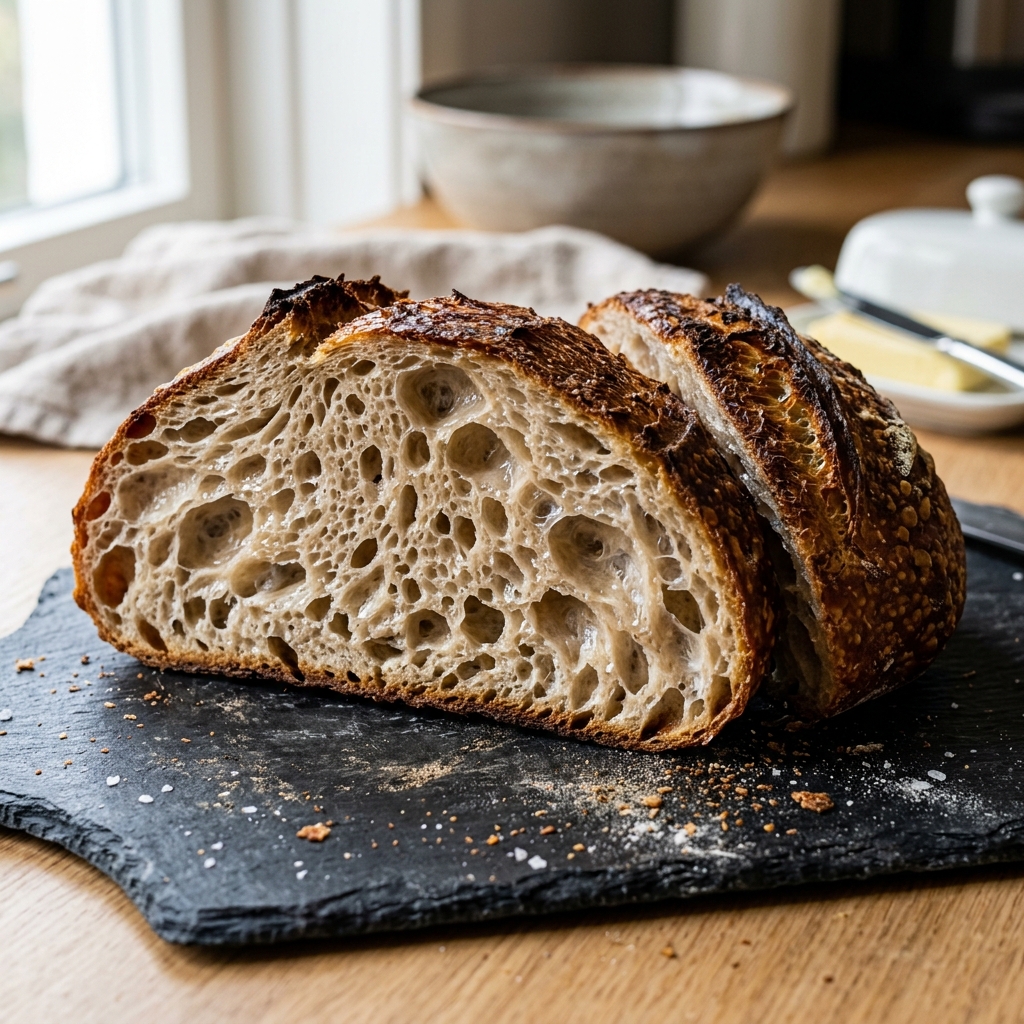
High-Hydration Sourdough Bread
A deep-brown, blistered crust that cracks when you squeeze it, and an open, irregular crumb that catches the light. This method uses an overnight cold retard and a Dutch oven to trap steam, so you get bakery-level rise and tang without a steam-injected oven.
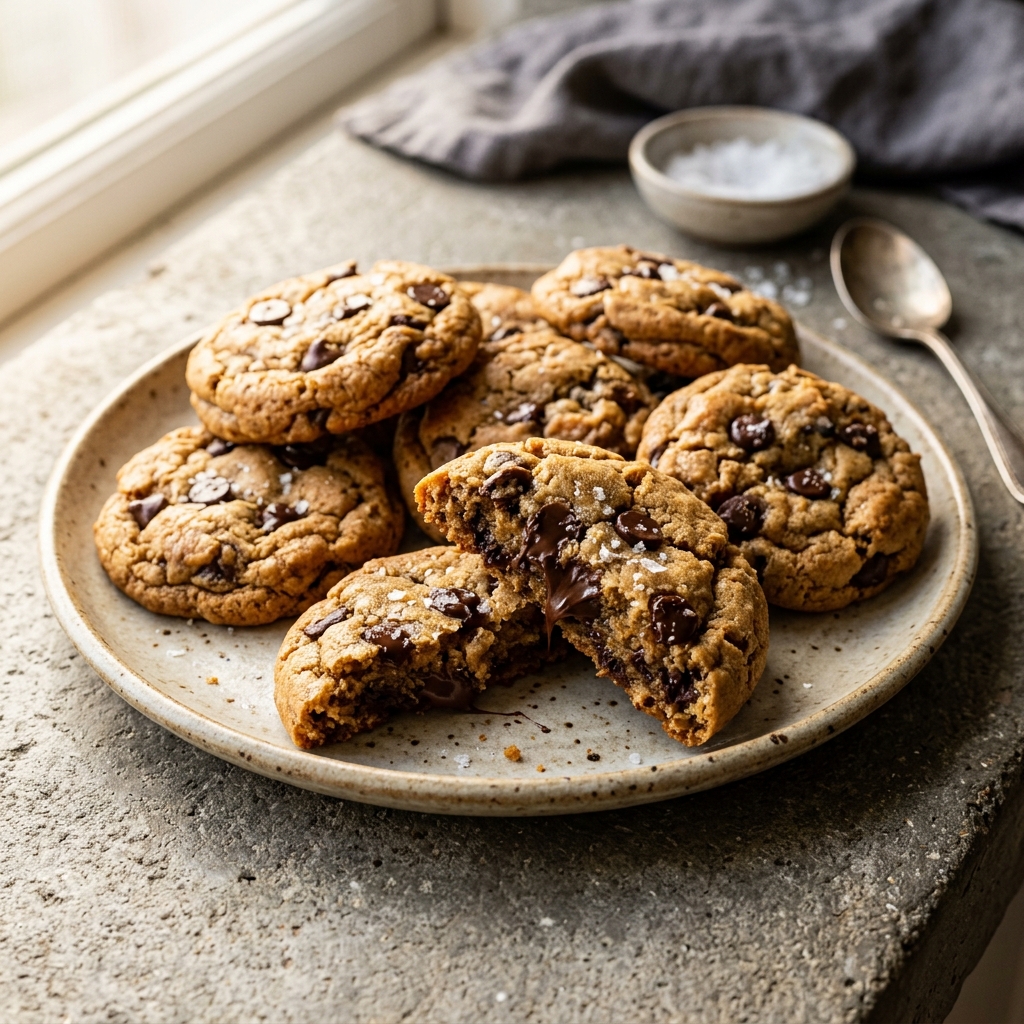
Chewy Keto Chocolate Chip Cookies
Golden edges, soft centers, and a texture that actually holds together — this keto-friendly version skips the usual gummy pitfalls. Made with almond flour and a precise balance of sweeteners, these are drop cookies that taste like the real thing.
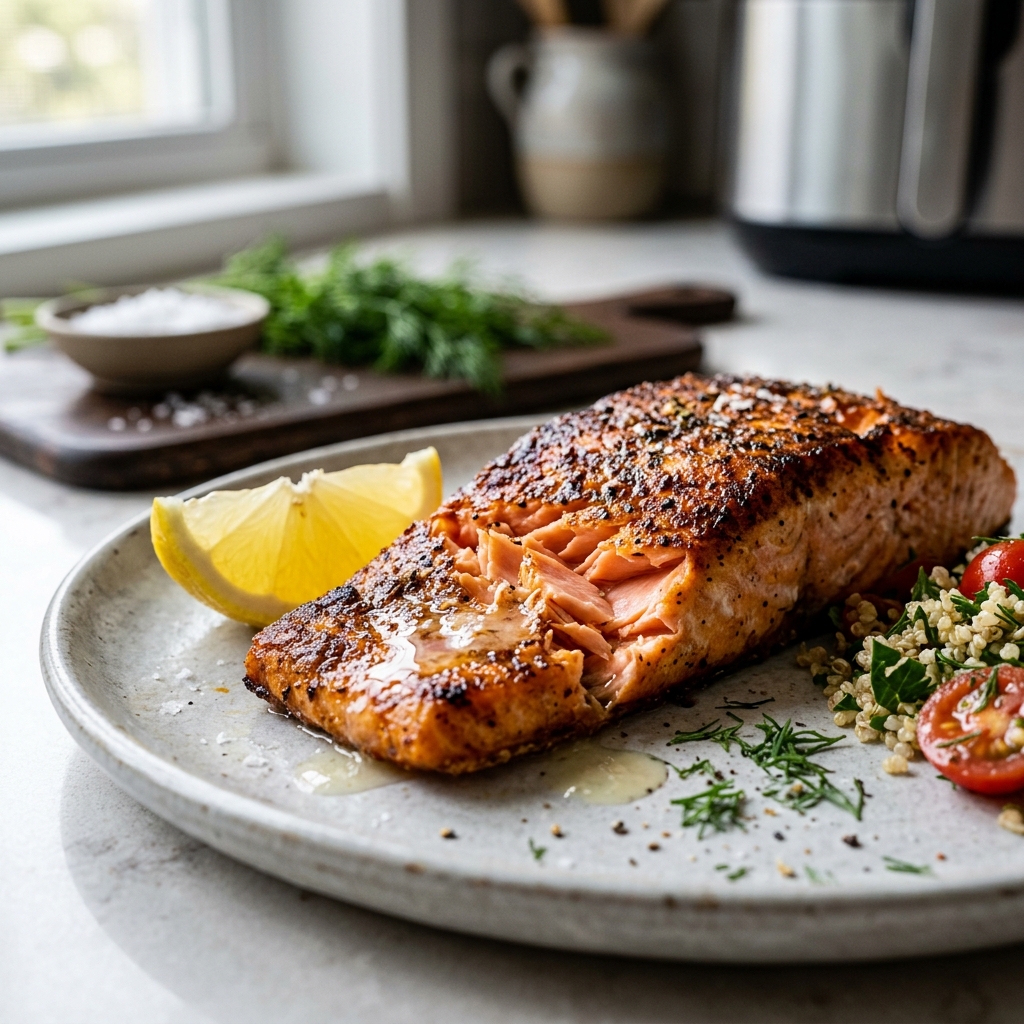
Perfect Air Fryer Salmon
Crispy-edged, flaky-centered salmon straight from the air fryer in under 12 minutes. No flipping halfway, no oil splatter — just a garlic-and-paprika crust that seals in the moisture.
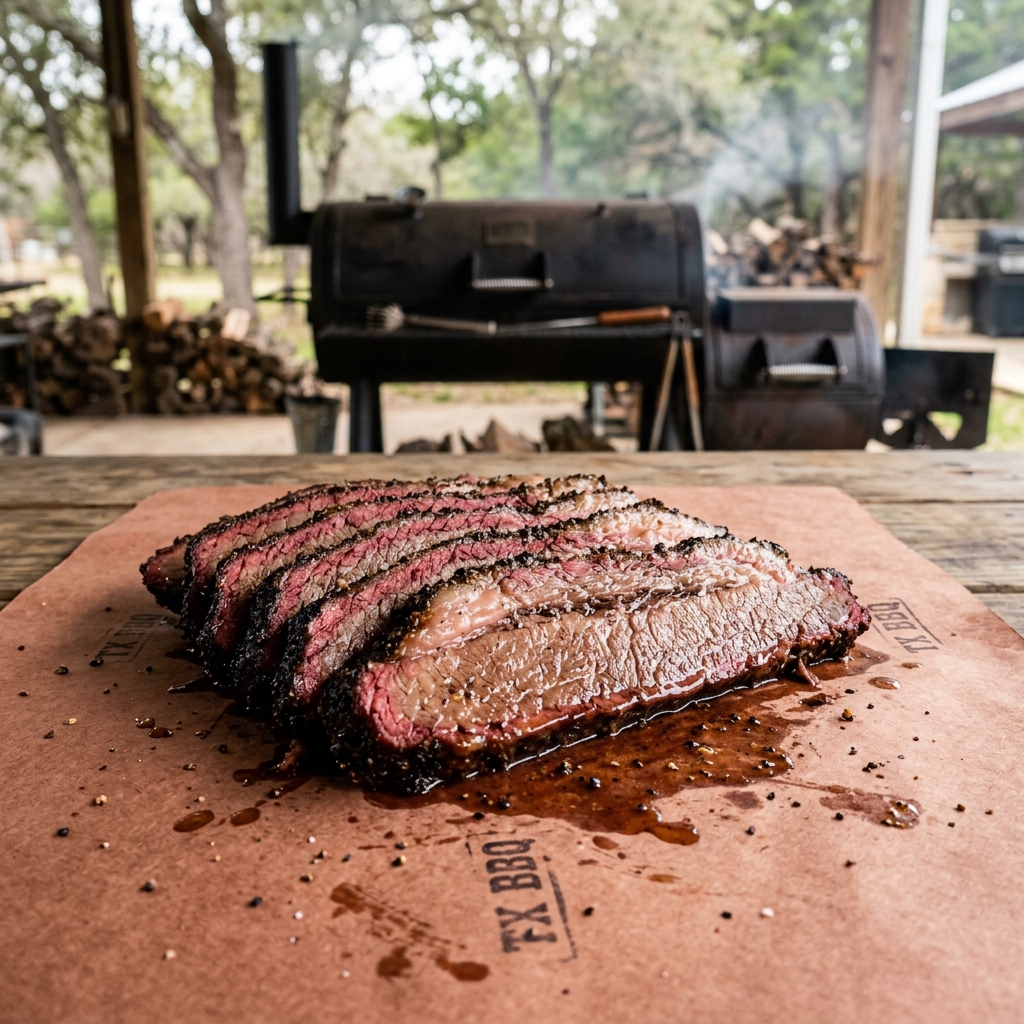
Texas-Style Smoked Brisket
A thick black bark, a deep pink smoke ring, and meat that pulls apart with zero resistance. This Texas-style method uses an overnight dry brine and a paper wrap to power through the stall, giving you competition-level brisket at home.
Tools For This Recipe
Use our precision calculators to adjust servings, convert measurements, and check doneness.
Finished Cooking?
Keep exploring — there is always more to discover in the kitchen.