Classic Chocolate Chip Cookies
classic chocolate chip cookies — a carefully crafted recipe that balances technique with approachability. Every step is designed to build confidence, not just follow instructions.
Before You Start
- 1Chill your dough if you can. Even 30 minutes in the fridge makes for thicker, chewier cookies.
Ingredients
For spread and lift.
Balances sweetness.
Cool room temp means 65°F. Not too soft.
Room temp emulsifies better.
Pure vanilla.
Step-by-Step Instructions
Whisk dry ingredients
In a medium bowl, whisk together the flour, baking soda, and salt. Set aside.
The flour should be fully incorporated with no streaks remaining.
Cream butter and sugars
In a stand mixer with the paddle attachment, beat the butter, brown sugar, and granulated sugar on medium speed for 3 minutes until light, fluffy, and pale. Scrape the bowl halfway through.
The mixture should be light, pale, and fluffy — that's the air you need for lift.
Add eggs and vanilla
Add the eggs one at a time, beating well after each. Add the vanilla and beat until combined. The mixture should look smooth and glossy. You'll find a rhythm quickly.
Combine and add chips
Reduce the mixer to low speed and gradually add the dry ingredients. Mix until just combined, with no visible flour streaks. Fold in the chocolate chips with a rubber spatula.
The dough will look crumbly at first — that's normal. Keep mixing and it'll come together.
The dough should be evenly mixed with chocolate distributed throughout.
Scoop and bake
Preheat the oven to 375°F (190°C). Line baking sheets with parchment.
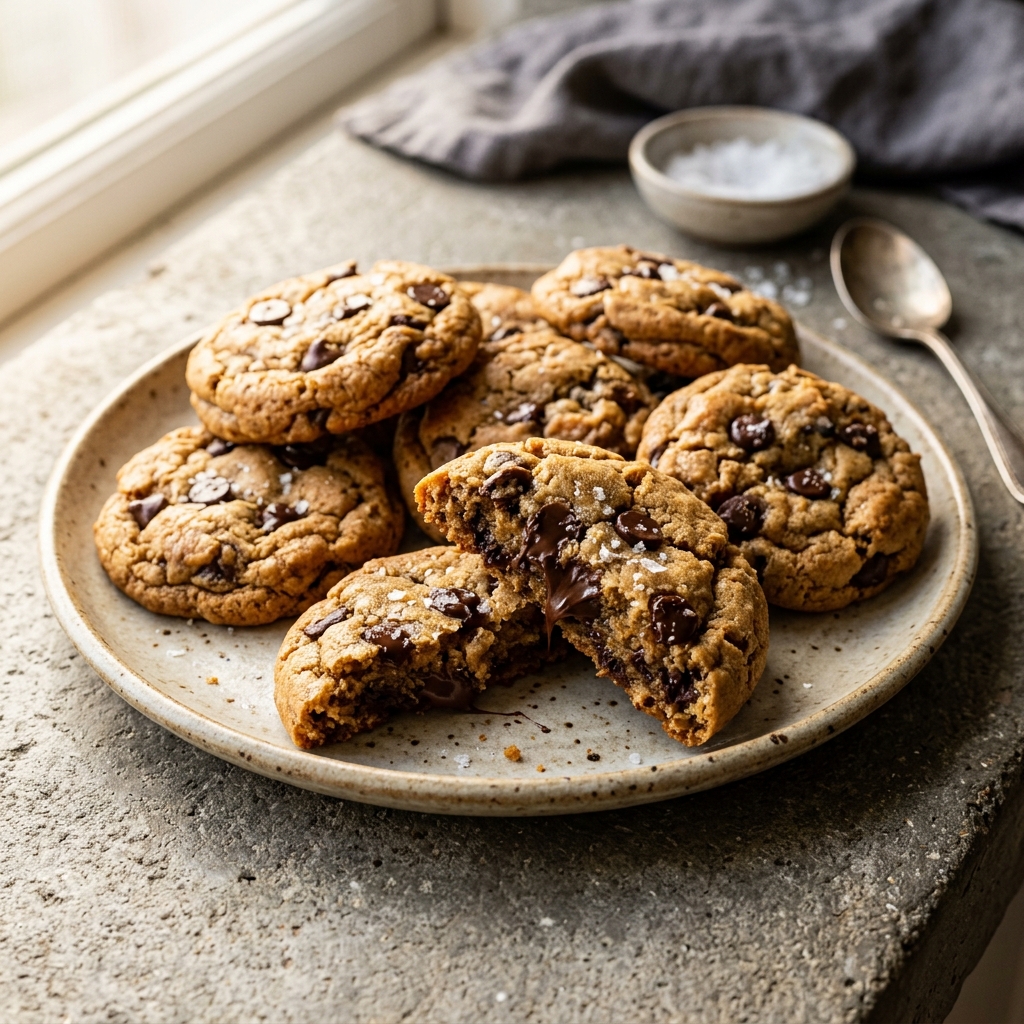
The cookies should be golden around the edges and still soft in the center.
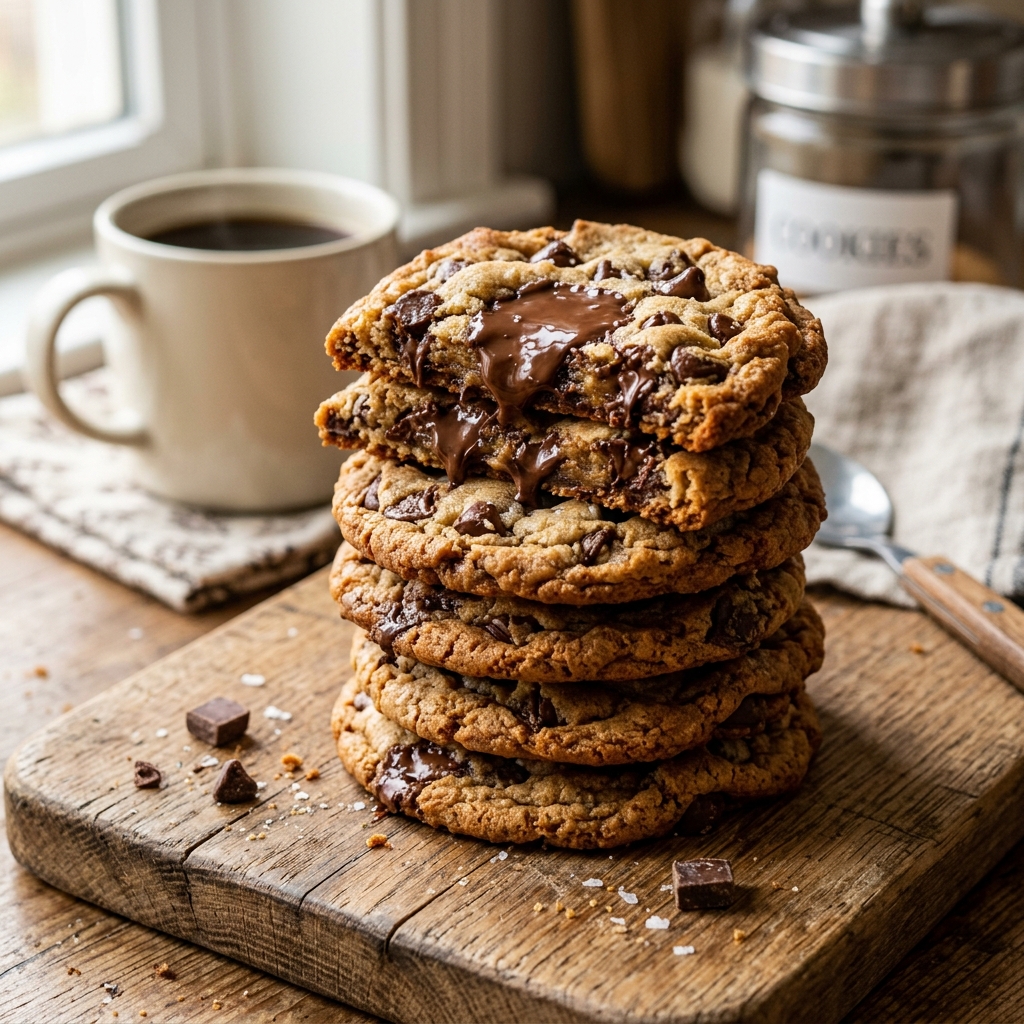
Cool and serve
Let the cookies cool on the baking sheet for 5 minutes, then transfer to a wire rack to cool completely. The centers will fall slightly and become perfectly chewy. Let them cool on the sheet for 5 minutes — the centers will set to that perfect chewy texture.
The cookies should be evenly golden with slightly darker edges and melted chocolate puddles.
How to Know It's Done
- The edges are golden brown and the centers are just set — still soft, not puffed.
- The cookies have spread to their expected diameter and the surface looks matte, not glossy.
- The cookies will continue baking on the hot sheet after you pull them out. Let them rest for 5 minutes before transferring.
Nutritional Profile
Macros listed below scale dynamically based on the serving size selected in the recipe card.
Kitchen Timer
Quick Facts
Need to scale or convert sizes?
This recipe links with our specialized calculators. Use them to calibrate oven dials, adjust brine salinity percentages, or scale baking pans.
Try the Butter ConverterTechnique Notes
- Chill the dough for 24 to 72 hours for deeper, toffee-like flavor. The wait develops complex caramel notes.
- For thinner, crispier cookies, use all granulated sugar. For thicker, chewier cookies, use all brown sugar.
- Freeze scooped dough balls on a sheet tray, then transfer to a freezer bag. Bake from frozen, adding 2 minutes.
Common Mistakes to Avoid
- Using melted butter instead of softened butter. Melted butter spreads too fast and gives you flat, greasy cookies.
Troubleshooting FAQ
You May Also Like
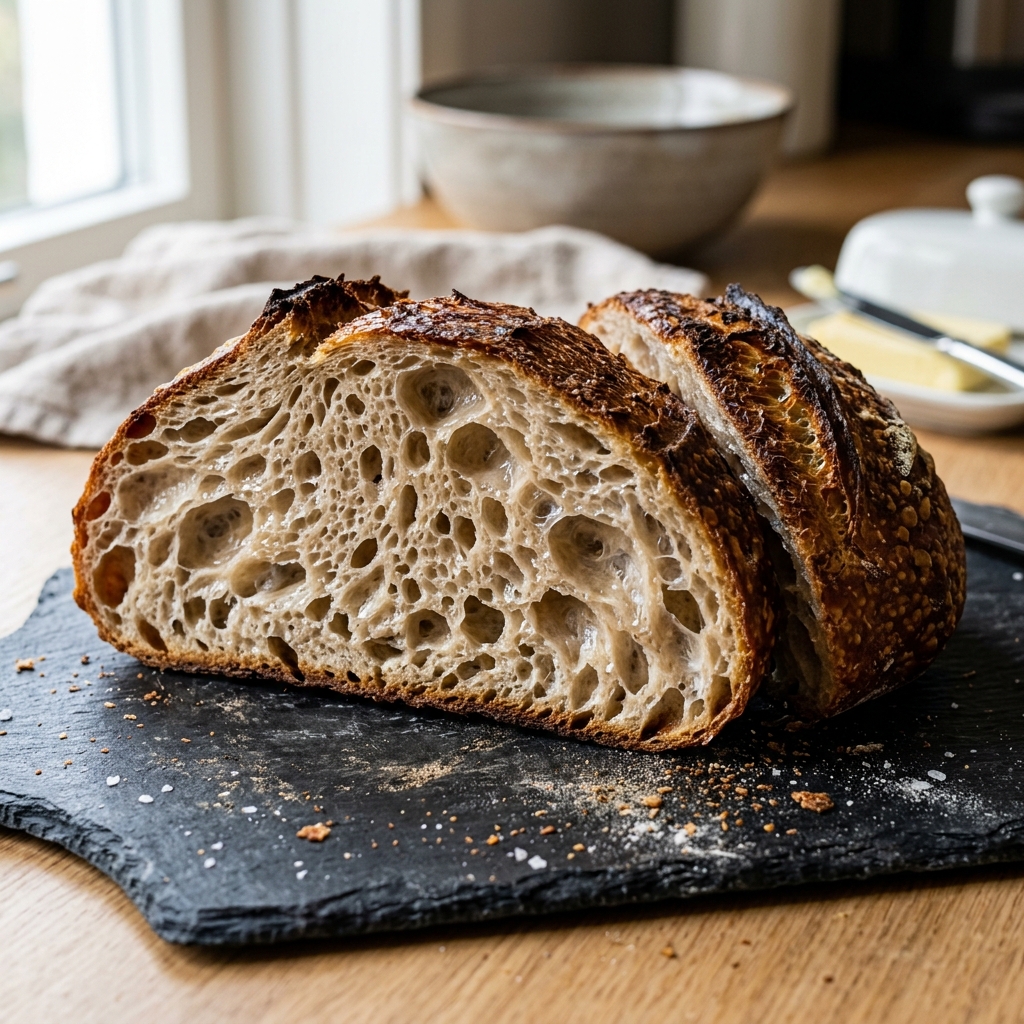
High-Hydration Sourdough Bread
A deep-brown, blistered crust that cracks when you squeeze it, and an open, irregular crumb that catches the light. This method uses an overnight cold retard and a Dutch oven to trap steam, so you get bakery-level rise and tang without a steam-injected oven.
Chewy Keto Chocolate Chip Cookies
Golden edges, soft centers, and a texture that actually holds together — this keto-friendly version skips the usual gummy pitfalls. Made with almond flour and a precise balance of sweeteners, these are drop cookies that taste like the real thing.
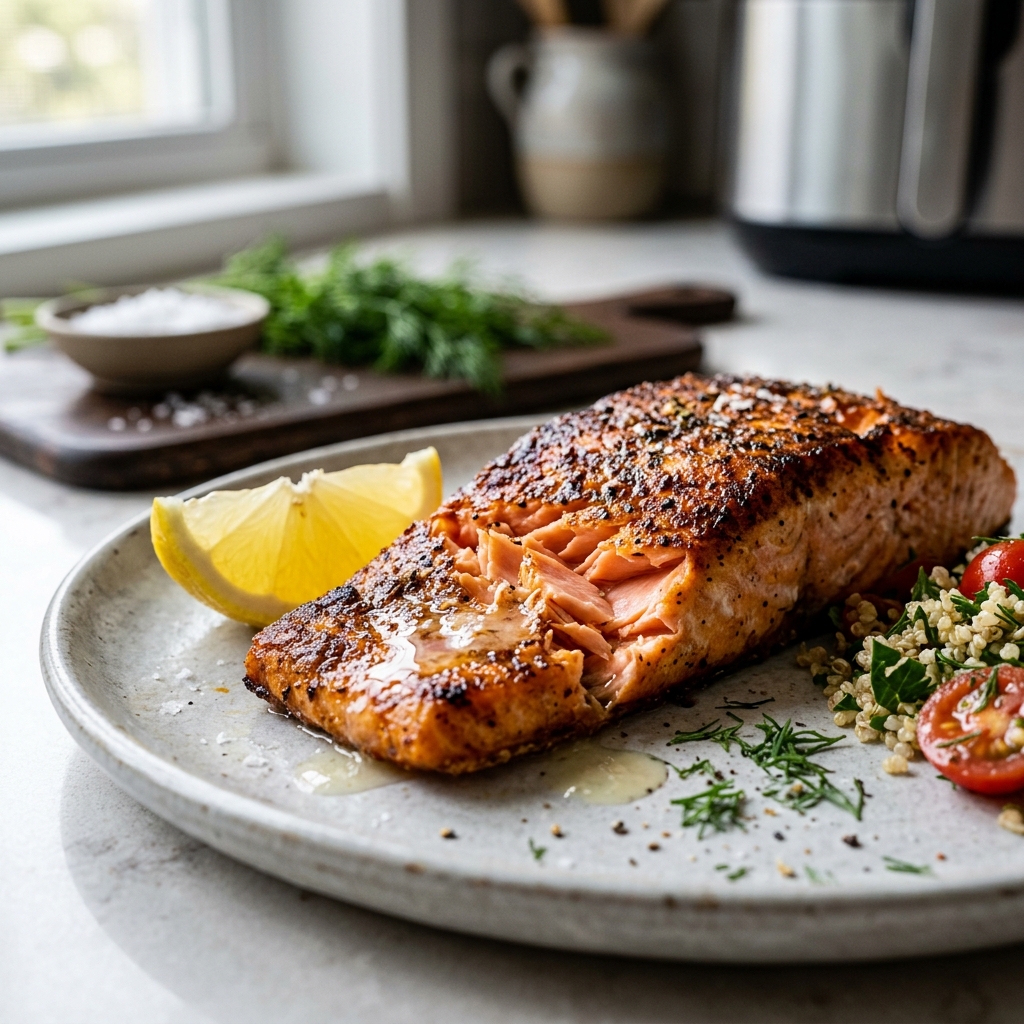
Perfect Air Fryer Salmon
Crispy-edged, flaky-centered salmon straight from the air fryer in under 12 minutes. No flipping halfway, no oil splatter — just a garlic-and-paprika crust that seals in the moisture.
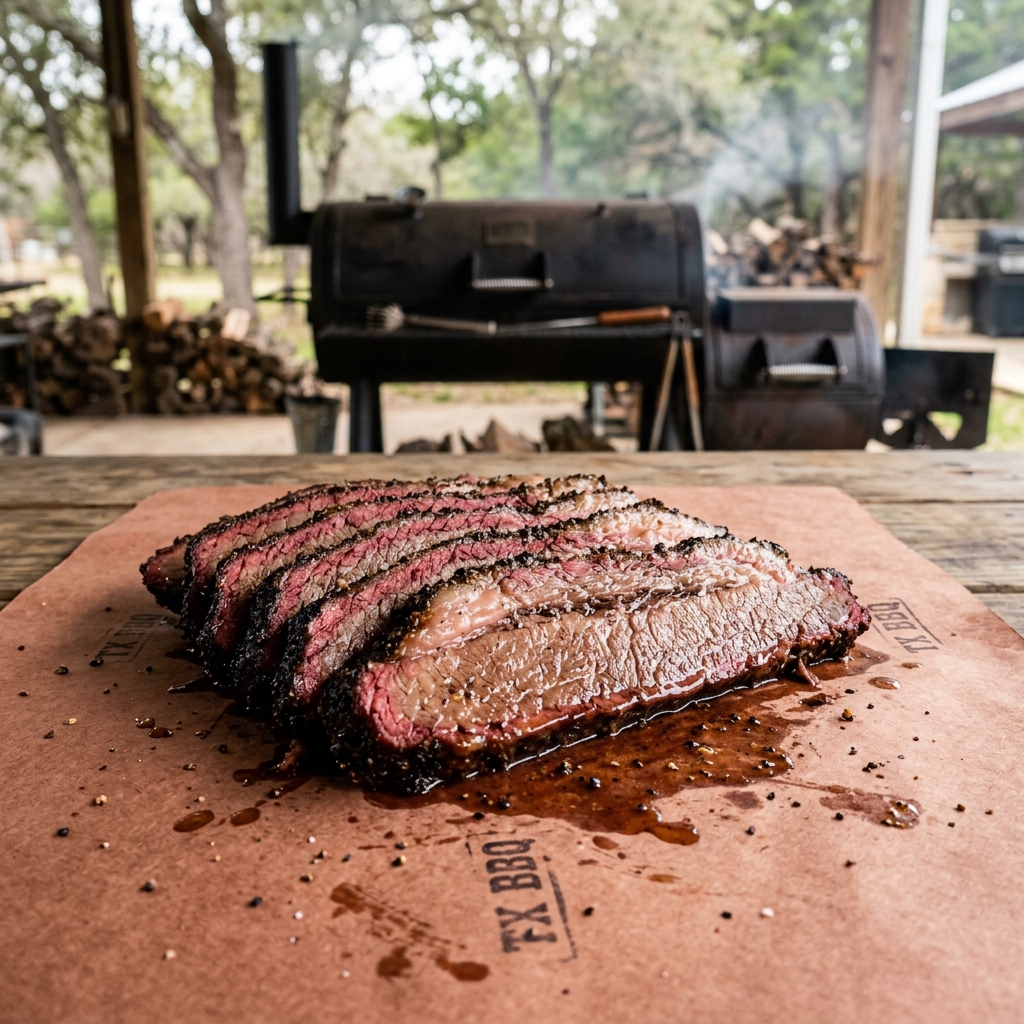
Texas-Style Smoked Brisket
A thick black bark, a deep pink smoke ring, and meat that pulls apart with zero resistance. This Texas-style method uses an overnight dry brine and a paper wrap to power through the stall, giving you competition-level brisket at home.
Tools For This Recipe
Use our precision calculators to adjust servings, convert measurements, and check doneness.
Finished Cooking?
Keep exploring — there is always more to discover in the kitchen.