Classic Beef Chili
classic beef chili — a carefully crafted recipe that balances technique with approachability. Every step is designed to build confidence, not just follow instructions.
Before You Start
- 1Read through the entire recipe before starting to make sure you have all ingredients and equipment ready.
Ingredients
80/20 or 85/15 gives the best flavor. Do not use extra lean; you need some fat for richness.
About 2 medium onions.
1 medium pepper, seeds and ribs removed.
Fresh garlic, not jarred.
The backbone of the chili. Use a good-quality blend like Gebhardt or Penzeys.
Adds earthy, warm depth.
Lends a subtle smoky character.
Mexican oregano if you can find it.
Add for extra heat. Leave out for a mild chili.
One 28-ounce can. Crushed give the best texture for chili.
Concentrated tomato flavor that thickens the chili.
Do not skip this. Coffee enhances the beef and chili flavors without tasting like coffee.
Just enough to balance the acidity of the tomatoes.
Adjust to taste.
Two 15-ounce cans. Rinsing removes excess sodium.
Adds creamy texture. Substitute with black beans if preferred.
Step-by-Step Instructions
Brown the Beef
Heat a large Dutch oven or heavy pot over medium-high heat. Add the ground beef and cook, breaking it apart with a spoon, until deeply browned, about 8 minutes. Do not stir constantly; let it sit and develop a crust. Transfer to a plate with a slotted spoon, leaving the rendered fat in the pot.
The texture should be rough and shaggy — that's the goal.
Sauté the Vegetables
Reduce the heat to medium. Add the onion and bell pepper to the fat in the pot and cook, stirring occasionally, until softened, about 6 minutes. Add the garlic and cook for 1 minute until fragrant.
Cooking the vegetables in the beef fat picks up all the browned bits from the bottom of the pot, infusing them with meaty flavor.
Bloom the Spices
Add the chili powder, cumin, smoked paprika, oregano, and cayenne. Stir constantly for 1 minute until the spices are toasted and smell fragrant. This is more about feel than precision. Trust your hands.
Blooming dried spices in hot fat unlocks their volatile oils, making the chili taste much more complex than if you just dumped the spices in with the liquid.
Each fold traps air, building the network for an airy crumb.
Build the Chili Base
Add the tomato paste and cook, stirring, for 2 minutes until it darkens to a rusty red. You'll feel the texture changing — that's exactly right. Pour in the crushed tomatoes, beef broth, coffee, brown sugar, and salt. Return the browned beef to the pot along with any collected juices.
Take a breath here. This is the part that separates good results from great ones.
Most people overwork the dough. Stop when it comes together — you're incorporating, not punishing it.
Simmer Low and Slow
Bring the chili to a boil, then reduce to a gentle simmer. Cook uncovered for 45 minutes, stirring occasionally, until thickened. Add the drained beans and simmer for another 15 minutes.
You should see bubbles around the edges. That's the liquid reducing.
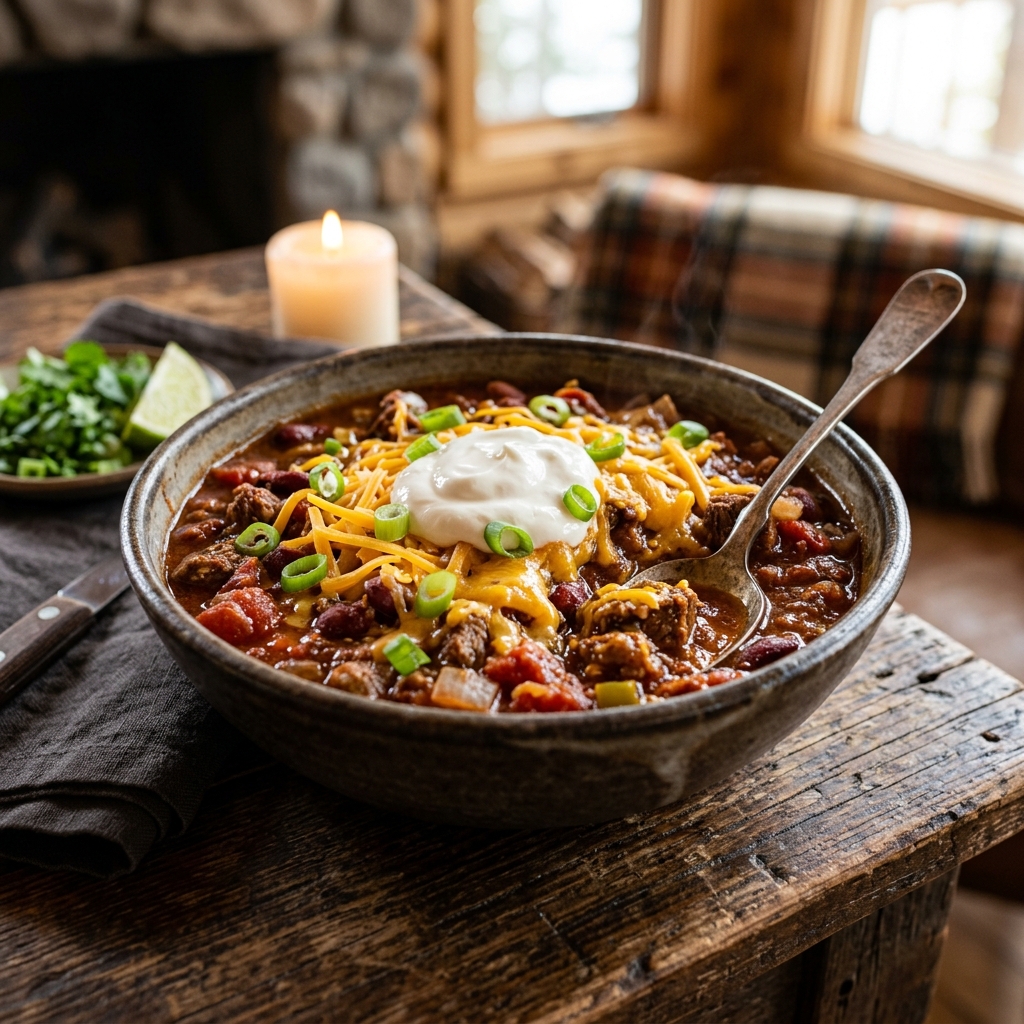
Rest and Serve
Remove from heat and let the chili rest for 10 minutes. Taste and adjust salt, heat, or acid (a splash of vinegar or lime juice). Serve with shredded cheddar, sour cream, diced onion, and Fritos or cornbread. Take a moment to admire your work. This is the payoff.
Don't worry if the mixture looks rough at first — it will come together as you work with it.
Chili always tastes better the next day. Make it a day ahead, refrigerate, and reheat gently. The flavors meld overnight into something incredible.
How to Know It's Done
- Internal temperature reaches 125°F (52°C) for medium-rare or 135°F (57°C) for medium.
- The surface has a deep brown crust, not gray.
- When in doubt, use an instant-read thermometer. It is the most reliable way to check doneness.
Nutritional Profile
Macros listed below scale dynamically based on the serving size selected in the recipe card.
Kitchen Timer
Quick Facts
Need to scale or convert sizes?
This recipe links with our specialized calculators. Use them to calibrate oven dials, adjust brine salinity percentages, or scale baking pans.
Try the Coffee Ratio CalculatorTechnique Notes
- Freezer-friendly: Let the chili cool completely, then portion into freezer bags. It keeps for 3 months. Thaw overnight in the fridge and reheat on the stovetop.
- For a thicker chili, mash 1 cup of the beans before adding them to the pot. This releases their starch naturally.
- If you do not drink coffee, substitute with a shot of espresso or 1/2 cup of dark brewed tea.
Common Mistakes to Avoid
- Not reading the recipe through before starting. A quick scan saves you from mid-cooking surprises.
Troubleshooting FAQ
You May Also Like
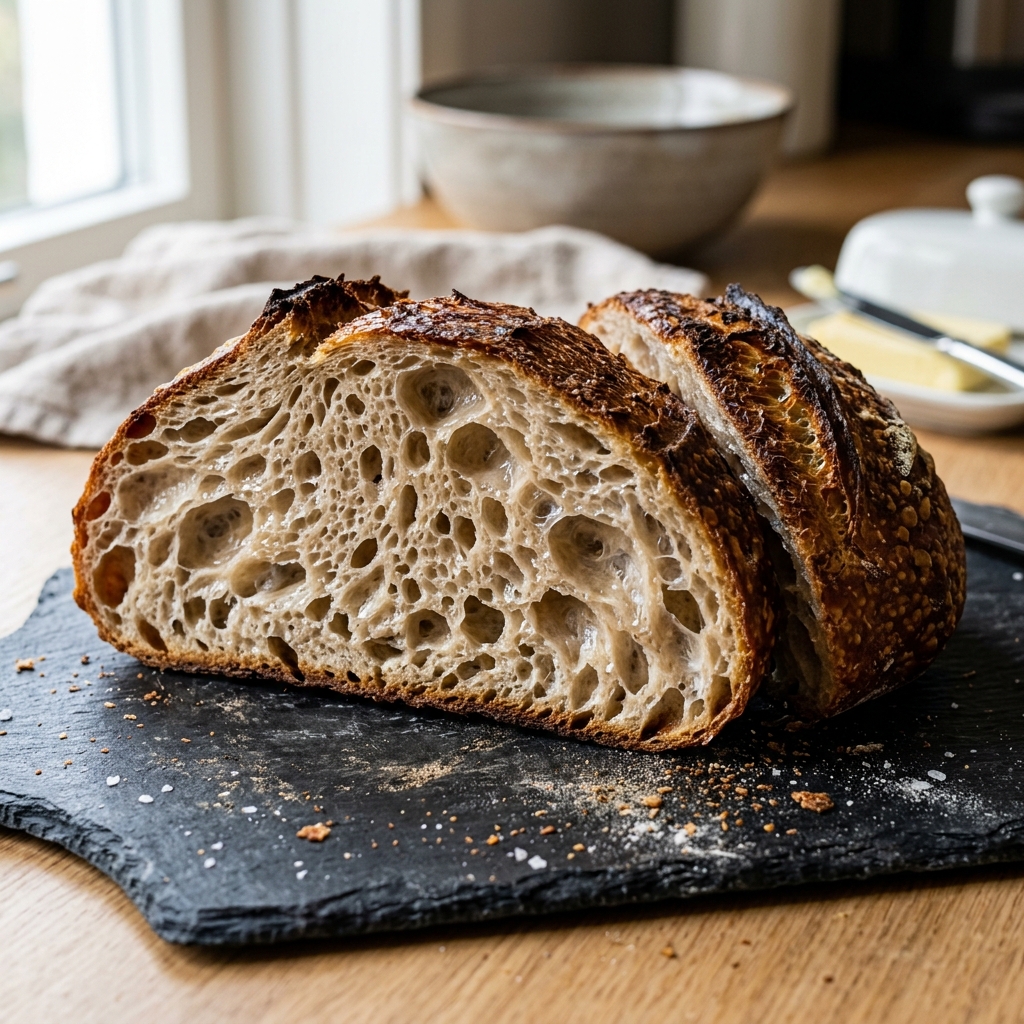
High-Hydration Sourdough Bread
A deep-brown, blistered crust that cracks when you squeeze it, and an open, irregular crumb that catches the light. This method uses an overnight cold retard and a Dutch oven to trap steam, so you get bakery-level rise and tang without a steam-injected oven.
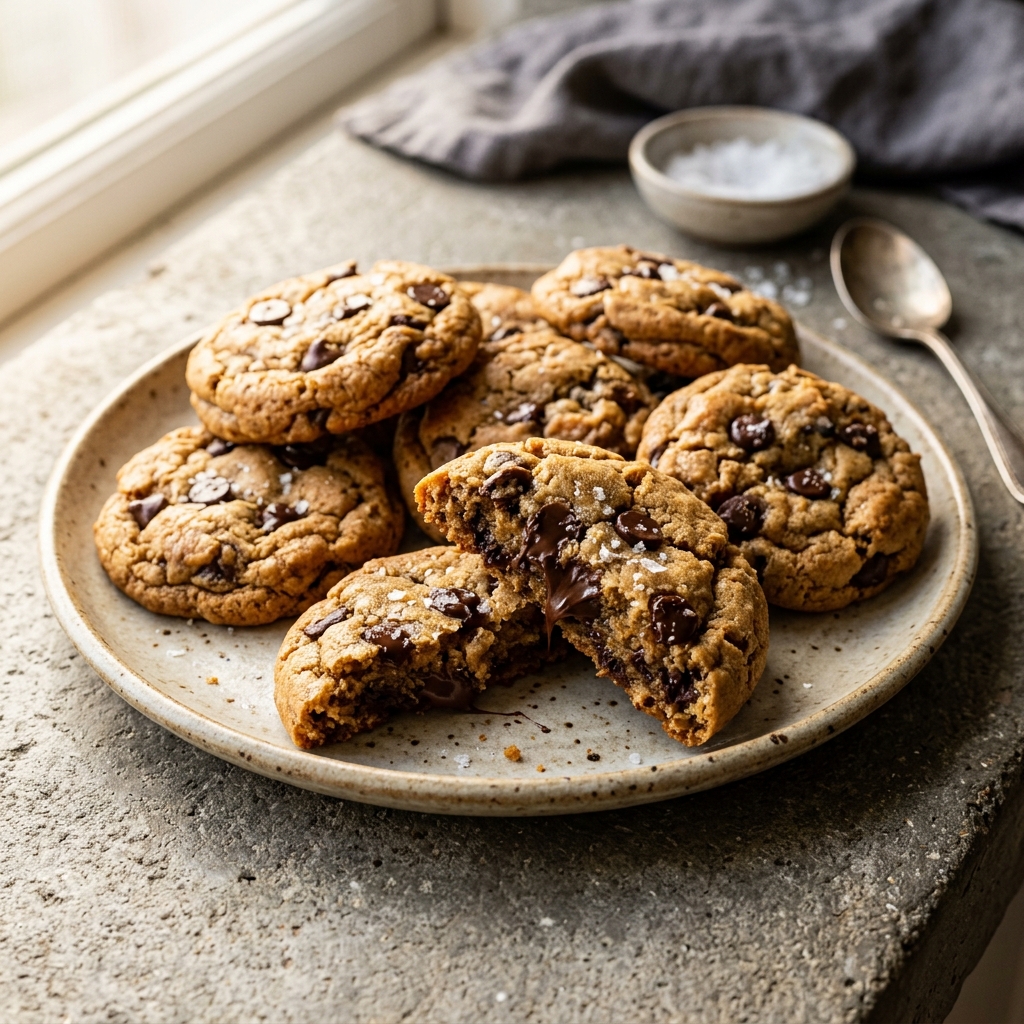
Chewy Keto Chocolate Chip Cookies
Golden edges, soft centers, and a texture that actually holds together — this keto-friendly version skips the usual gummy pitfalls. Made with almond flour and a precise balance of sweeteners, these are drop cookies that taste like the real thing.
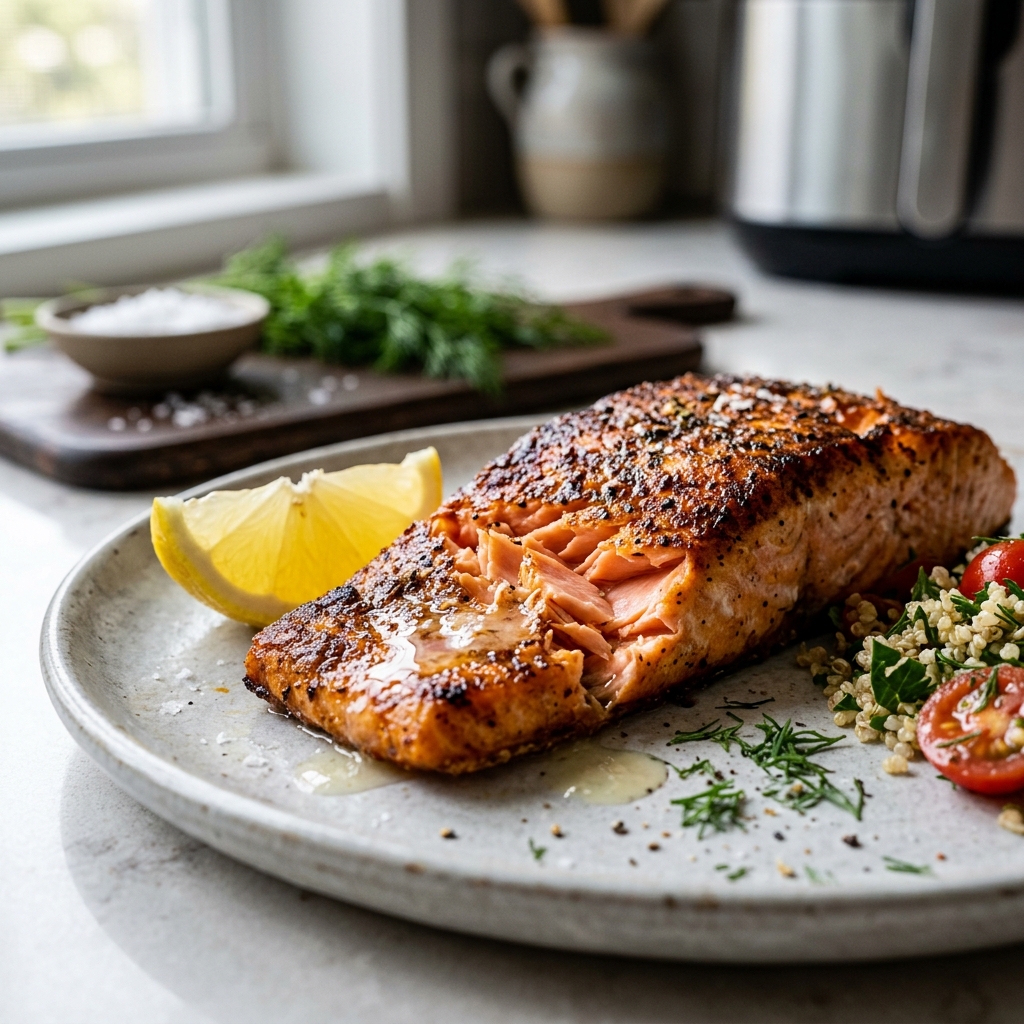
Perfect Air Fryer Salmon
Crispy-edged, flaky-centered salmon straight from the air fryer in under 12 minutes. No flipping halfway, no oil splatter — just a garlic-and-paprika crust that seals in the moisture.
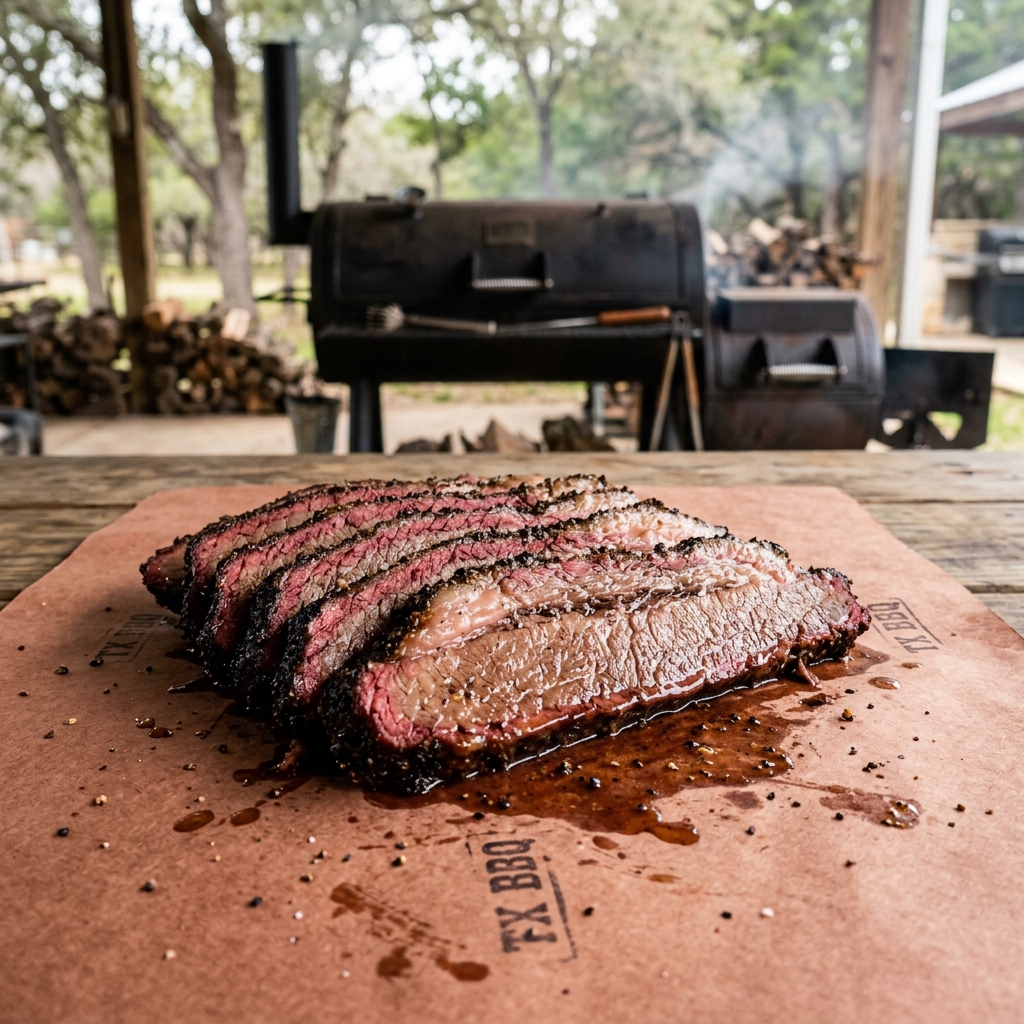
Texas-Style Smoked Brisket
A thick black bark, a deep pink smoke ring, and meat that pulls apart with zero resistance. This Texas-style method uses an overnight dry brine and a paper wrap to power through the stall, giving you competition-level brisket at home.
Tools For This Recipe
Use our precision calculators to adjust servings, convert measurements, and check doneness.
Finished Cooking?
Keep exploring — there is always more to discover in the kitchen.